

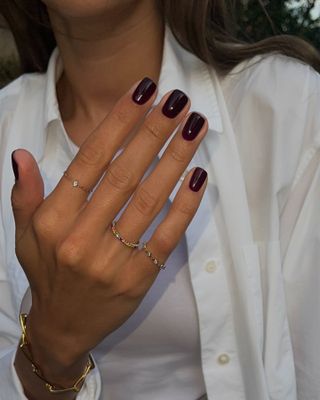
Is it just me, or does everyone coincidentally misplace their nail polish remover right when they’re itching for a fresh, clean set? I can’t even count the amount of times I’ve had to make a mad dash to the drugstore the second my mani starts to chip. (Otherwise, I’ll start to peel the polish off myself, which is a major no for strong, healthy nails.)
The good news is that nail polish removers aren’t a huge investment when it comes to impromptu beauty purchase. You can find plenty of options for under $10! Still, I’ve always been curious whether any at-home staples can dissolve the pigment in a pinch, so I reached out to celebrity manicurists Stephanie Stone and Deborah Lippmann for all their polish removing tips. Keep scrolling—lots of myth busting ahead.
How to Correctly Remove Nail Polish
First, let’s assume you actually have a remover on-hand. It may sound pretty obvious, but experts do have a tried-and-true method—especially when it comes to removing darker varnishes with a higher chance of staining your nails. I’ve always wondered why it takes me multiple rounds to fully remove my polish when professional nail techs can reveal a clean nail plate in one swipe. It turns out, I’ve been overlooking some key steps. Find everything you need to know below.
- Saturate: First, saturate a cotton ball or pad with your remover. “You don’t want it so soaked that it’s dripping but you do want a generous amount of product to help the removal along,” says Stone.
- Soak: Press the pad onto your nail and hold it for about five to 10 seconds. Don’t move it! “You want to let the product sit on the nail for easier removal,” Stone advises.
- Shimmy: Next, “apply gentle pressure onto the cotton round and shimmy it towards the free edge,” she explains. You don’t want to rub the pigment around too much, as that will only stain your cuticles and nail beds with polish residue. “Pulling it down removes the polish in a mess free way,” Stone adds.
- Repeat: Repeat this process for each nail until all your polish has been removed.
If you’re wearing darker nail polish, Lippmann recommends taking small pieces of cotton, saturating them with remover, and leaving them to set on each nail for a full 30 seconds before sliding the pieces off. “This trick easily takes off all colors and avoids getting the polish stains all over your nail beds and hands,” she says. “It also avoids all the damage usually inflicted by pressing down too hard and rubbing your nails and cuticles, which ultimately causes weakened nails and breakage.”
For the visual learners out there, Stone also has a helpful Instagram tutorial that walks you through each step.
Extra Tips and Common Mistakes
So that’s the basic tutorial, but Lippmann and Stone have some important considerations to keep in mind.
- Let your nails soak: Giving the remover enough time to break up the polish is essential. You only need a few seconds to soak, but those extra moments make a huge difference!
- Don’t rub: According to Stone, the most common mistake is “rubbing [the remover] around thinking the motion will remove the product quicker. This typically just creates a mess lengthening the process of clean up and removal.”
- Choose your remover wisely: Pretty much every nail polish remover contains acetone, which is what effectively clears the lacquer. However, the ingredient can be quite drying to the nail beds, and the amount of acetone you’ll need really depends on your mani. “Darker colors will need a higher level of acetone in their remover to get them fully clean, but a more neutral or lighter color can utilize something gentler with less acetone,” Stone says.
- Use the right cotton: “People might not expect that the type of cotton you use when removing your nail polish matters!” says Lippmann. “I recommend using cotton that is lint-free. This will ensure that those little fuzzy pieces that show up under your nail polish are not there.”
- Take care of your cuticles: “It is SO important to maintain nail care in between manicures,” adds Lippmann. “This includes shaping and buffing, softening and pushing back cuticles, and nourishing your nail beds.” Stone recommends applying cuticle oil immediately after removing nail polish (“Sometimes even before if you really want to protect your skin!” she says) to counteract the drying effects of acetone.

Essie
Apricot Nail and Cuticle Oil
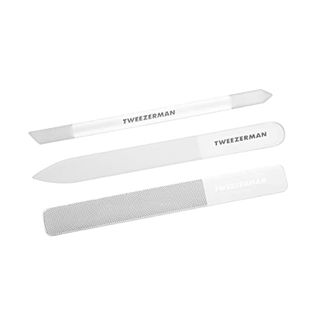
Tweezerman
Glass Nailcare Set
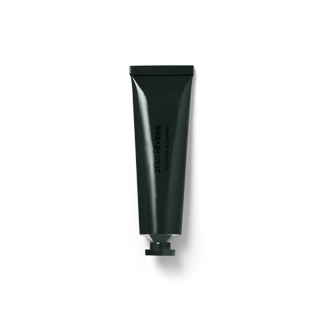
Victoria Beckham Beauty
21:50 Rêverie Hand Cream
Can You Get Rid Nail Polish Without Remover?
Okay, but what if you’re in a pinch and don’t have any acetone? While both Stone and Lippmann strongly advise running to the drugstore to pick up a new bottle, there are some creative—albeit not as effective—ways to remove your lacquer at home. Here are a few hacks I found after some digging.
- Olive or coconut oil: “I’m not saying I recommend doing this… but if you’re in a nail crisis, I would recommend trying olive oil or coconut oil. Apply a generous amount of oil to each nail and let them sit for a few minutes. Use a cloth to rub off the polish,” says Lippmann. “This is a gentle alternative that will keep your nails hydrated, but it may not work for all types of polish.”
- Rubbing alcohol: If you’ve got rubbing alcohol laying around, it may be worth giving that a try since alcohol, similar to acetone, can melt away the paint. Note, “you are probably going to be rubbing for as long as it would take the average person to run to a drugstore and buy a bottle of nail polish remover,” caveats Stone.
- Hand sanitizer: Hand sanitizer is alcohol-based, so it could theoretically work in a similar way to rubbing alcohol. (Stone or Lippmann didn’t specifically give the green light on this one, but there are Reddit threads that swear its efficacy!)
- Perfume: Again, many perfumes are alcohol-based, which could help dissolve the paint. The thought of wasting my favorite fragrance on a nail polish hack honestly makes me shudder, but if you have an old or expired perfume you don’t mind parting with, it might be worth a try!
- Top coat: Others find that if you apply a new layer of top coat over your old polish and wipe it off with a cotton pad while it’s still wet, the pigment will slide right off.
You might see other tricks online (vinegar! Baking soda! Hairspray!) that promise effective results, but according to the experts, those DIY routes don’t really cut it. “None of these things are going to be hassle-free,” advises Stone.
In fact, you may even be doing more harm than good with these DIY tricks, since you’d likely be exposing your nails to potentially-drying ingredients (like alcohol) way longer than you would an acetone-infused solution. “If nail polish remover weren’t so accessible I would suggest getting creative, but you can find it at most drugstores sometimes as low as $2, which is cheaper than a lot of the other things you might use as ‘hacks!'” adds Stone.
TL;DR? Sure, you can remove your nail polish at home sans remover, but the experts don’t really recommend it. “Honestly, unless you are a professional chemist or Nara Smith, I wouldn’t recommend trying to DIY nail polish remover,” jokes Stone. You’d be better off braving a chipped mani until you can get yourself a new bottle.
Shop Nail Polish Removers
We have a full list of nail polish removers for you to browse (even a few acetone-free formulas for those with super sensitive skin!), but here are some of my personal favorites to have on file.
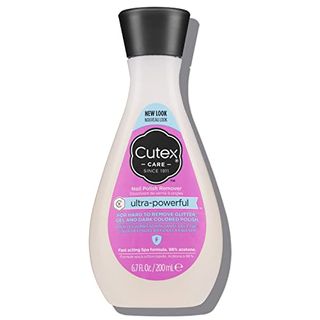
Cutex
Nail Polish Remover
It’s classic, it’s powerful, and it will only set you back $3. This is my go-to remover for darker manis that may need a little more acetone.
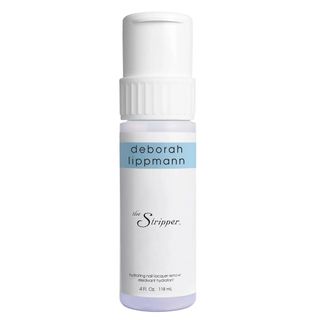
Deborah Lippmann
The Stripper
If chalky residue left around your nail beds makes you cringe (same), you need Lippmann’s star remover in your arsenal. It contains lavender essential oil and aloe vera extract to prevent the dreaded dryness.
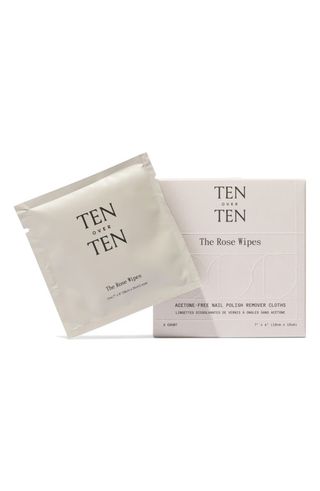
Tenoverten
The Rose Wipes
I love traveling with these Rose Wipes. They make polish removal such a breeze. They’re acetone-free, so I’ll need to spend a few extra seconds soaking each fingertip, but my nails are left feeling nice and hydrated.
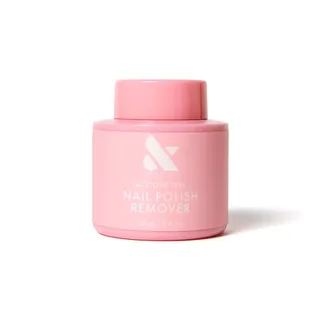
Olive & June
Nail Polish Remover Solution
This mess-free, acetone-free remover is arguably the most handy option you can buy. Simply stick your finger into the foam center, swirl it around for a few seconds, and watch the polish dissolve before your eyes. It even comes with a built-in sponge cap to easily remove toe polish, too.
Mineral Fusion
Nail Polish Remover
I’ve picked up this acetone-free polish more times than I can count at this point. I can always find it at Whole Foods or online at Amazon, and it never makes my nails feel rough and dry.
Explore More: